On this page
article
4.Vue
一套用于快速构建用户界面的渐进式前端框架
1.Vue介绍

- Vue.js:简称Vue,是一套用于快速构建用户界面的渐进式前端框架。
- Vue.js核心实现
- 响应式数据绑定:当数据发生改变,视图可以自动更新,不用关心DOM操作,专心数据操作。
- 可组合的视图组件:把视图按照功能切分成若干个基本单元,可维护,可重用,可测试等特点。
- 响应式,双向数据绑定,即MVVM。是指数据层(Model)-视图层(View)-数据视图(ViewModel)的响应式框架。
1.2引入Vue.js
- 在html中使用CDN包的形式引入
<script src="https://unpkg.com/vue@3"><script>
- 下载js文件保存到本地再导入
- 使用npm安装
npm install @vue/cli@4.5.12
- 使用官方vuecli脚手架创建项目(不建议新手使用)
vue create vue-demo
番外:
- const var let的区别
- var有设计缺陷,不建议使用
- 用const和let定义变量,const本身是常量的意思
- let 定义函数内局部变量
function xxx() {
    let xxx
}
1.3声明式渲染
- Hello World示例:Vue.js 的核心是一个允许采用简洁的模板语法来声明式地将数据渲染进 DOM 的系统
<html>
<head>
    <meta http-equiv="Content-Type" content="text/html;charset=UTF-8">
    <title>demo</title>
    <script src="https://unpkg.com/vue@3"></script>
    <style>

    </style>
</head>
<body>
    <div id="hello-vue">
        {{ message }}
    </div>
    <script>
        const { ref } = Vue
        const HelloVueApp = {
            setup() {
                const message = ref('Hello,Vue')
                return {
                    message
                }
            }
        }
        Vue.createApp(HelloVueApp).mount('#hello-vue')
    </script>
</body>
</html>

- 现在数据和DOM已经被建立了关联,所有东西都是响应式的,可通过下面示例确认:
<html>
<head>
    <meta http-equiv="Content-Type" content="text/html;charset=UTF-8">
    <title>demo</title>
    <script src="https://unpkg.com/vue@3"></script>
    <style>

    </style>
</head>
<body>
    <div id="hello-vue">
        Conter: {{ counter }}
    </div>
    <script>
        //引入vue原生方法
        const { ref,onMounted } = Vue
        const HelloVueApp = {
            setup() {
                //变量定义
                const counter = ref(5)

                //生命周期钩子
                onMounted(() => { //在挂载时去干什么事
                    //定时器
                    setInterval(() => {
                        //ref定义的变量,在js内部使用,必须加value
                        counter.value ++
                    },1000) //每隔一秒执行一次
                })

                //如果需要html使用,则需要返回出去
                return {
                    counter
                }
            }
        }
        Vue.createApp(HelloVueApp).mount('#hello-vue')
    </script>
</body>
</html>
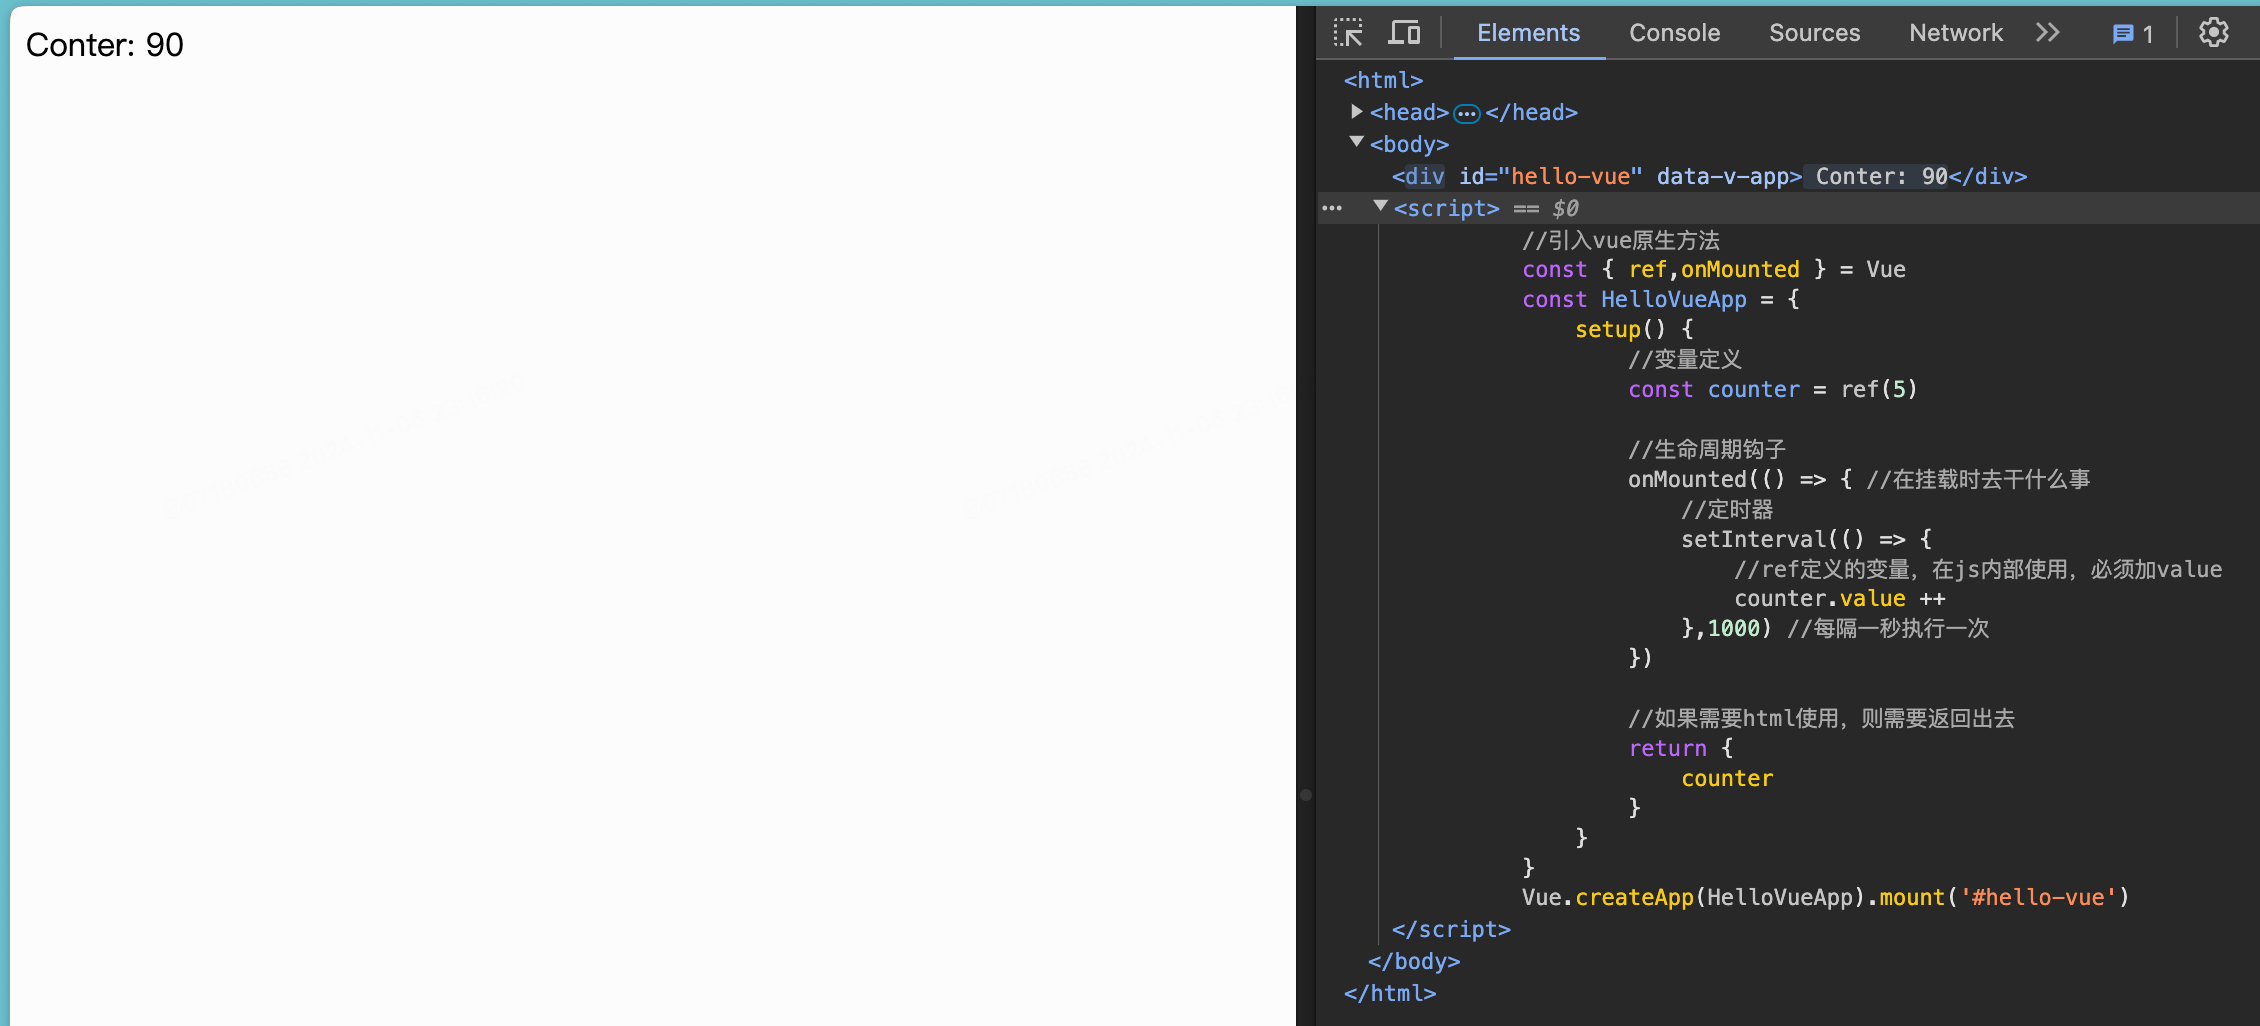
1.4模版语法
- Vue.js使用了基于HTML的模板语法,允许开发者声明式的将
DOM绑定致底层组件实例的数据,所有Vue.js的模板都是合法的HTML,所以能被遵循规范的浏览器和HTML解析器解析, - 数据绑定最常见的形式就是使用
{{ }},语法在HTML中插入文本:<span>Message:{{ msg }}</span> {{ msg }}将被替换为对应组件实例中msg属性的值,无论何时,绑定的组件实例上msg属性发生改变,传入HTML的值也会随之改变。
2.Vue3响应式
- 解决了:Vue2中新增属性,删除属性(对象),界面不会更新的问题。
- 解决了:Vue2中直接通过下标修改数组,界面不会刷新的问题。
2.1ref函数(基本数据类型的定义)
- 作用:定义一个响应式的数据即变量(基本类型)。
- 语法:
let a = ref('Hello Vue!') - 创建一个包含响应式数据的引用对象(reference对象)。
- JS中操作数据:
a.value - 模板中读取数据,不需要
.value,直接:<div>{{ a }}<div> - 接收的数据可以是基本类型,也可以是对象类型(自动转reactive)。
- 基本类型的数据:响应式依然是靠
Object.defineProperty()的get与set完成的(vue2响应式的实现方式)。 - 对象类型的数据:内部使用了Vue3中的一个新函数:reactive函数
<html>
<head>
    <meta http-equiv="Content-Type" content="text/html;charset=UTF-8">
    <title>demo</title>
    <script src="https://unpkg.com/vue@3"></script>
    <style>

    </style>
</head>
<body>
    <div id="hello-vue">
        {{ message }}
    </div>
    <script>
        const { ref } = Vue
        const HelloVueApp = {
            setup() {
                const message = ref('Hello,Vue')
                return {
                    message
                }
            }
        }
        Vue.createApp(HelloVueApp).mount('#hello-vue')
    </script>
</body>
</html>
2.2reactive函数
- 作用:定义一个对象类型的响应式数据(基本类型数据不能用,要用ref函数)。
- 语法:const 代理对象=reactive(原函数),接收一个对象或数组,返回一个代理对象(proxy对象)。
- reactive定义的响应式数据是深层次的。
- 内部基于ES6的Proxy实现,通过代理对象操作源内部数据进行操作。
- 用法与ref创建的代理对象类似,不过操作时不需要再加.value了
<html>
<head>
    <meta http-equiv="Content-Type" content="text/html;charset=UTF-8">
    <title>demo</title>
    <script src="https://unpkg.com/vue@3"></script>
    <style>

    </style>
</head>
<body>
    <div id="hello-vue">
        {{ student }}
        <br>
        {{ student.name }}
    </div>
    <script>
        const { ref,reactive,onMounted } = Vue
        const HelloVueApp = {
            setup() {
                onMounted(() => {
                    student.name = "chi"
                })
                //定义对象 reactive返回一个proxy对象,实现对象类型的响应式
                //使用const定义对象,对象本身不能改变,但是对象的属性可以改变
                    //  错误:student = "xxx"
                    //  正确:student.name = "xxx"
                const student =  reactive({
                    name: "fei",
                    age: "2",
                    score:70
                })
                console.log(student)
                return {
                    student
                }
            }
        }
        Vue.createApp(HelloVueApp).mount('#hello-vue')
    </script>
</body>
</html>
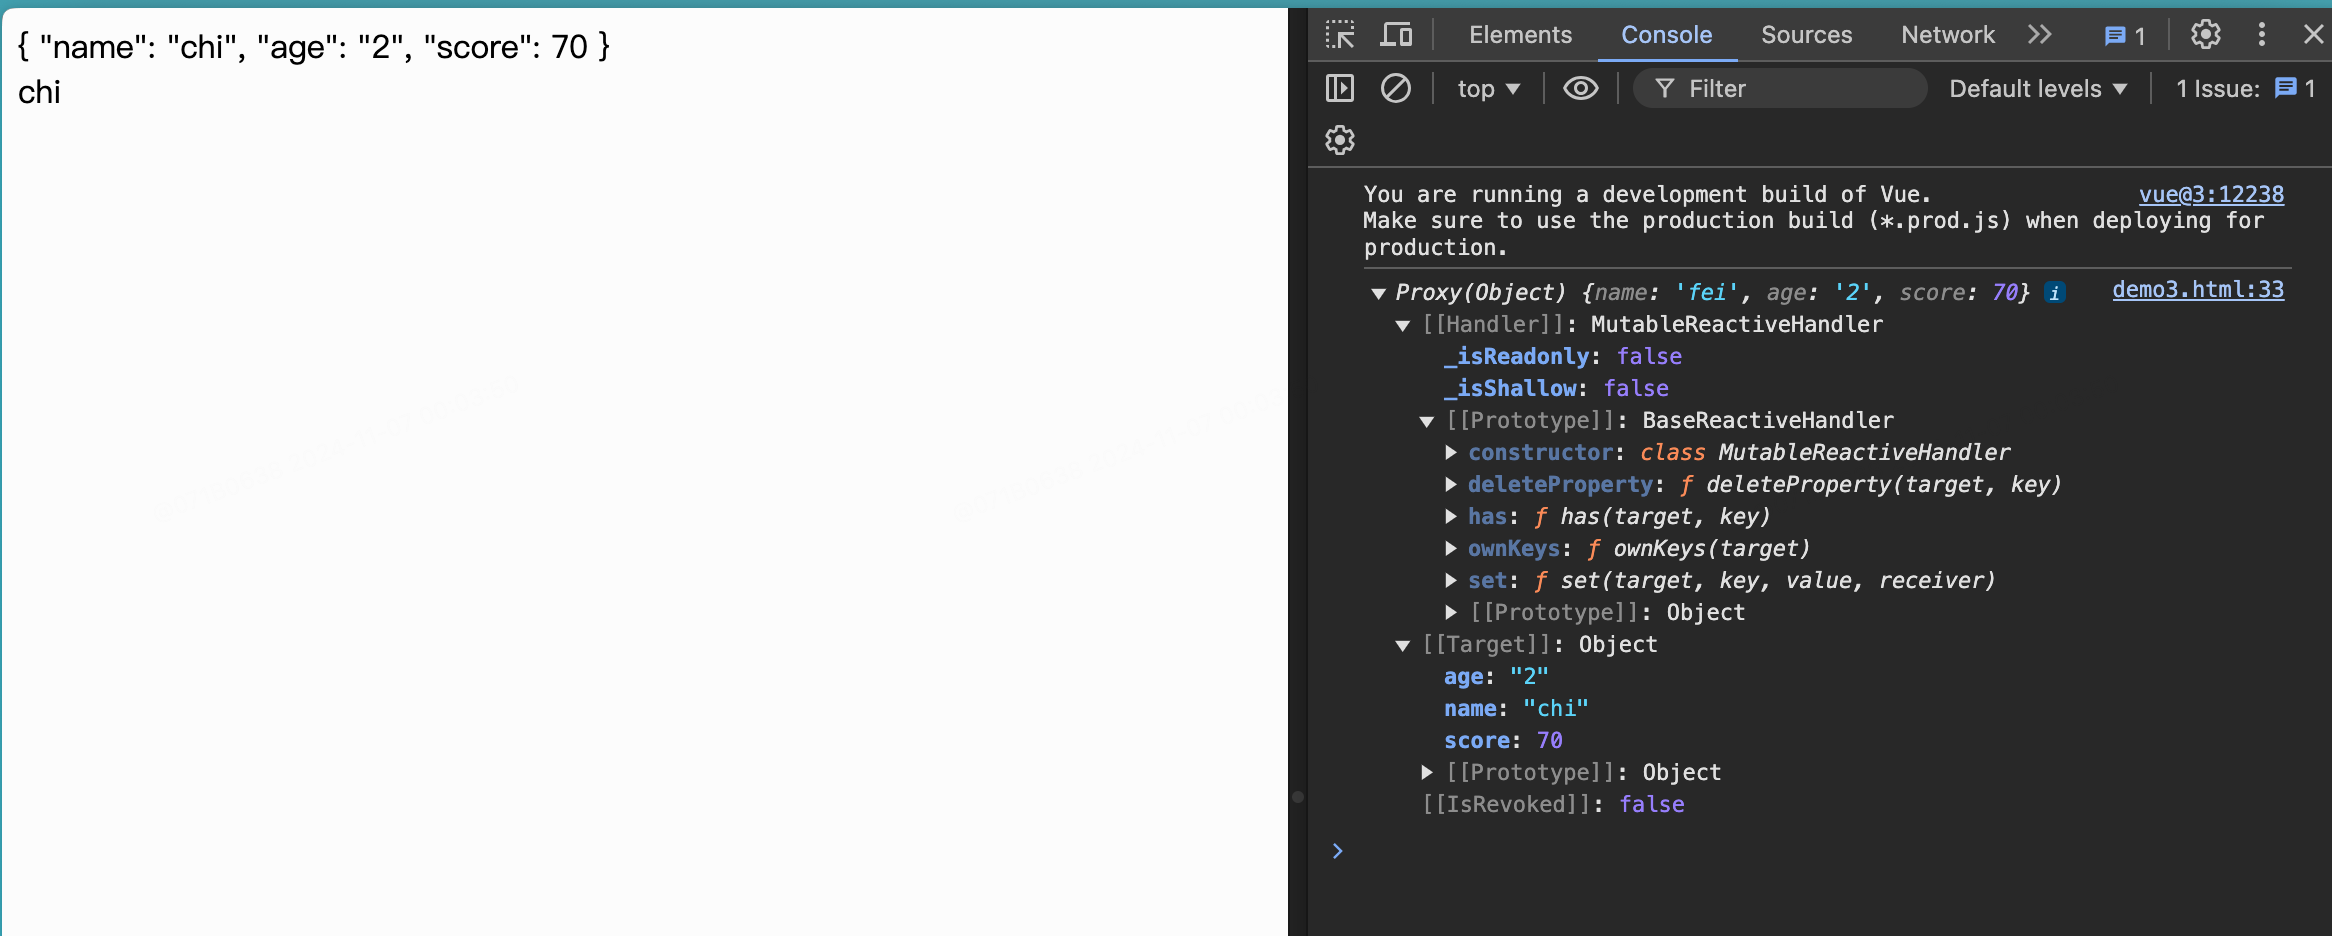
3.Vue常用指令
- 指令:带有
v-前缀的特殊属性。 - 指令的作用:当表达式的值改变时,将其产生的连带影响,响应式地作用于 DOM。
3.1v-text
- v-text 作用与双大花括号作用一样,将数据填充到标签中。但没有闪烁问题!
<html>
<head>
    <meta http-equiv="Content-Type" content="text/html;charset=UTF-8">
    <title>demo</title>
    <script src="https://unpkg.com/vue@3"></script>
    <style>

    </style>
</head>
<body>
    <div id="hello-vue">
        <p v-text="msg"></p>
        <!--v-text插入这个p标签的值-->
        <p>{{ msg }}</p>
    </div>
    <script>
        const { ref } = Vue
        const HelloVueApp = {
            setup() {
                const msg = ref("Hello Vue!")
                return {
                    msg
                }
            }
        }
        Vue.createApp(HelloVueApp).mount('#hello-vue')
    </script>
</body>
</html>
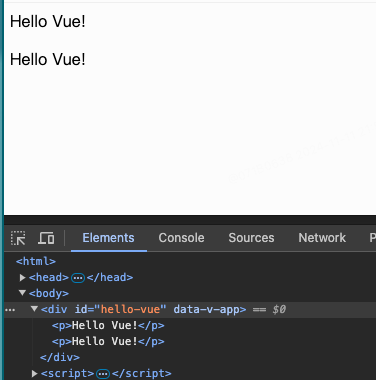
3.2v-html
- 某些情况下,从服务端请求的数据本身就是一个HTML代码,如果用双大括号会将数据解 释为普通文本,而非HTML代码,为了输出真正的HTML,需要使用
v-html指令:
<html>
<head>
    <meta http-equiv="Content-Type" content="text/html;charset=UTF-8">
    <title>demo</title>
    <script src="https://unpkg.com/vue@3"></script>
    <style>

    </style>
</head>
<body>
    <div id="hello-vue">
        {{ msg }}
        <br>
        <span v-html="msg"></span>
    </div>
    <script>
        const { ref } = Vue
        const HelloVueApp = {
            setup() {
                const msg = ref("<span style='color: brown'>Hello Vue!<span>")
                return {
                    msg
                }
            }
        }
        Vue.createApp(HelloVueApp).mount('#hello-vue')
    </script>
</body>
</html>
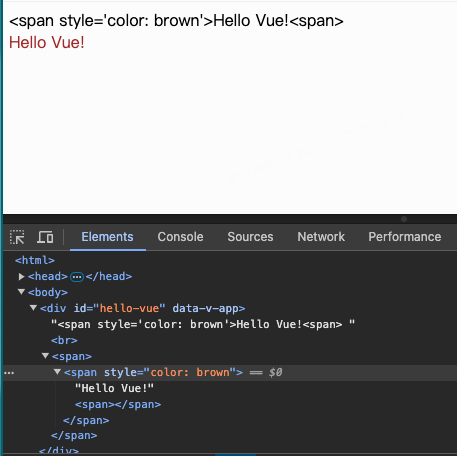
3.3v-on
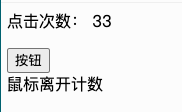
- 在前端开发中,我们经常监听用户发生的事件,例如点击、拖拽、键盘事件等。 在Vue中如何监听事件呢?使用
v-on指令 v-on: 冒号后面是event参数,例如click、change
<html>
<head>
    <meta http-equiv="Content-Type" content="text/html;charset=UTF-8">
    <title>demo</title>
    <script src="https://unpkg.com/vue@3"></script>
    <style>

    </style>
</head>
<body>
    <div id="hello-vue">
        <p>点击次数: {{ counter }}</p>
        <button v-on:click="counter++">按钮</button>
        <br>
        <a type="text" id="fname" v-on:mouseout="counter++">鼠标离开计数</a>
    </div>
    <script>
        const { ref } = Vue
        const HelloVueApp = {
            setup() {
                const counter = ref(0)
                return {
                    counter
                }
            }
        }
        Vue.createApp(HelloVueApp).mount('#hello-vue')
    </script>
</body>
</html>
3.4v-bind
- 用于动态绑定一个或多个属性值,或者向另一个组件传递props值(这个后面再介绍)
- 应用场景:图片地址src、超链接href、动态绑定一些类、样式等等
3.4.1绑定超链接
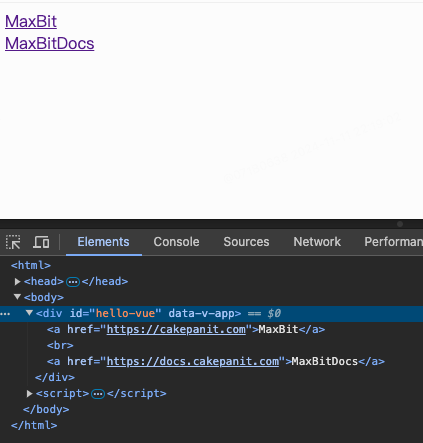
v-bind指令后接收一个参数,以冒号分割。v-bind指令将该元素的 href 属性与表达式 url 的值绑定。
<html>
<head>
    <meta http-equiv="Content-Type" content="text/html;charset=UTF-8">
    <title>demo</title>
    <script src="https://unpkg.com/vue@3"></script>
    <style>

    </style>
</head>
<body>
    <div id="hello-vue">
        <a href="https://cakepanit.com">MaxBit</a>
        <br>
        <a v-bind:href="url">MaxBitDocs</a>
    </div>
    <script>
        const { ref } = Vue
        const HelloVueApp = {
            setup() {
                const url = "https://docs.cakepanit.com"
                return {
                    url
                }
            }
        }
        Vue.createApp(HelloVueApp).mount('#hello-vue')
    </script>
</body>
</html>
3.4.2绑定Class
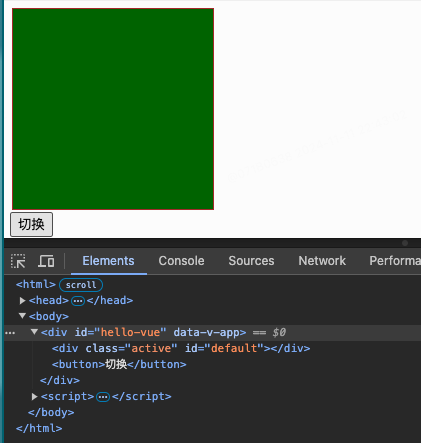
- 操作元素(标签)的 class 和 style 属性是数据绑 定的一个常见需求。
- 例如希望动态切换class,为div显示不同背景颜色
<html>
<head>
    <meta http-equiv="Content-Type" content="text/html;charset=UTF-8">
    <title>demo</title>
    <script src="https://unpkg.com/vue@3"></script>
    <style>
        #default {
            height: 200px;
            width: 200px;
            border: 1px solid brown;
            margin: 2px;
        }
        .active {
            height: 200px;
            width: 200px;
            background-color: darkgreen;
        }
    </style>
</head>
<body>
    <div id="hello-vue">
        <!--如果isActive为true,那么class="active"属性出现-->
        <div v-bind:class="{active:isActive}" id="default"></div>
        <button v-on:click="Onclick()">切换</button>
    </div>
    <script>
        const { ref } = Vue
        const HelloVueApp = {
            setup() {
                const isActive = ref(false)
                function Onclick(){
                    if (isActive.value) {
                        isActive.value = false
                    } else {
                        isActive.value = true
                    }
                }
                return {
                    isActive,
                    Onclick
                }
            }
        }
        Vue.createApp(HelloVueApp).mount('#hello-vue')
    </script>
</body>
</html>
3.4.3绑定Style
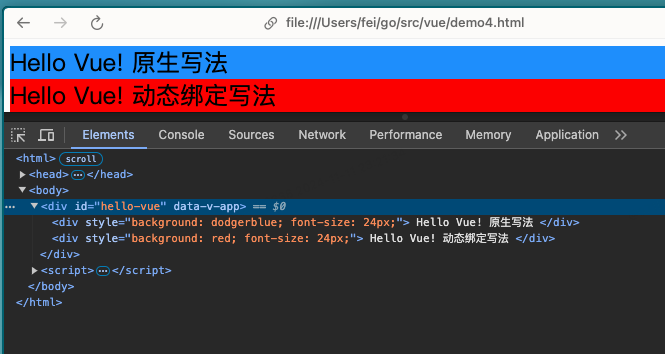
v-bind:style的对象语法看着非常像 CSS,但其实是一个 JavaScript 对象。- 可以使用v-bind在style样式中传递样式变量。
- 使用时需要将css样式名中带”-“的转成驼峰命名法,如font-size,转为fontSize
- 例如后台管理系统中改变侧边栏宽度
<html>
<head>
    <meta http-equiv="Content-Type" content="text/html;charset=UTF-8">
    <title>demo</title>
    <script src="https://unpkg.com/vue@3"></script>
    <style>
    </style>
</head>
<body>
    <div id="hello-vue">
        <div style="background: dodgerblue;font-size: 24px">
            Hello Vue! 原生写法
        </div>
        <div v-bind:style="{background: color,fontSize: num + 'px'}">
            Hello Vue! 动态绑定写法
        </div>
    </div>
    <script>
        const { ref } = Vue
        const HelloVueApp = {
            setup() {
                const color = ref('red')
                const num = 24
                return {
                    color,
                    num
                }
            }
        }
        Vue.createApp(HelloVueApp).mount('#hello-vue')
    </script>
</body>
</html>
3.4.4指令缩写
-
v-前缀作为一种视觉提示,用来识别模板中 Vue 特定的 属性。 但对于一些频繁用到的指令来说,就会感到使用繁琐。 -
因此,Vue 为 v-bind 和 v-o n 这两个最常用的指令,提供了特定简写: v-bind 缩写
-
v-bind缩写
<!--完整语法-->
<a v-bind:href="url"> ... </a>
<!--缩写-->
<a :href="url"> ... </a>
<!--动态参数的缩写-->
<a :[key]="url"> ... </a>
v-on缩写
<!--完整语法-->
<a v-on:click="doSomething"> ... </a>
"<!--缩写-->
<a @click="doSomething"> ... </a>
<!--动态参数的缩写-->
<a @[event]="doSomething"> ... </a>
4.Vue常用属性
4.1setup函数
- setup是vue3中的一个全新的配置项,值为一个函数。
- setup是所有CompositionAPI(组合API)的基础,组件中所用到的数据、方法等都需要在setup中进行配置。
- setup中的两种返回值:
- 若返回一个对象,则对象中的属性,方法,在模板中都可以使用。
- 若返回一个渲染函数(html):可以定义渲染内容。
import { h } from 'vue'
...
setup() {
...
	return () ==> h('h1','学习')
}
- setup执行的时机:在 beforeCreate(vue实例创建) 之前执行一次,this 是 undefine。
- setup的参数
- props:值为对象,包含:组件外部传递过来,且组件内部声明接收了的属性。
- context:上下文对象
- attrs:值为对象,包含组件外部传递过来,但没有在props配置中声明的属性。
- slots:收到的插槽内容,想到相当于this.$slots。
- emit:分发自定义事件的函数,相当于this.$emit。
- 注意点:
- 尽量不要与Vue2配置混用。
- Vue2配置(data,methos,computed…)中可以访问到 setup 中的属性,方法。
- 但setup中不能访问到vue2配置(data,methos,computed…)。
- 如果重名,setup中的优先。
- setup不能是 async 函数,因为返回值不再是return的对象,而是 promise,模板中看不到 return 对象中的属性。
- 尽量不要与Vue2配置混用。
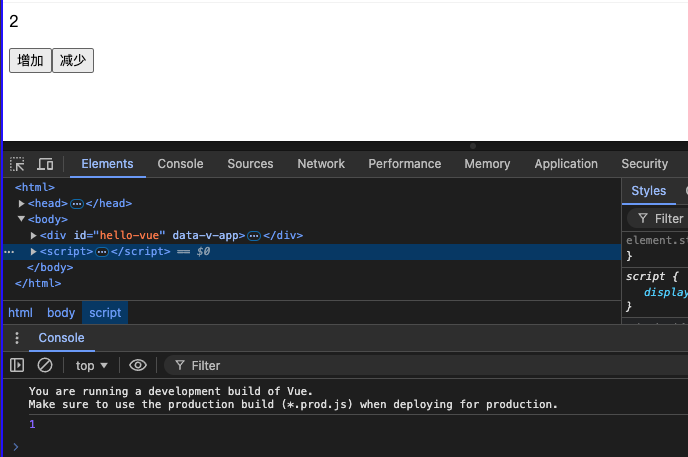
4.2方法
- 使用function关键字定义的数据处理函数。
- 定以后在return中返回,才能在模板中使用
<html>
<head>
    <meta http-equiv="Content-Type" content="text/html;charset=UTF-8">
    <title>demo</title>
    <script src="https://unpkg.com/vue@3"></script>
    <style>
    </style>
</head>
<body>
<div id="hello-vue">
    <p>{{ count }}</p>
    <button @click="increment()">增加</button>
    <button @click="subIncrement()">减少</button>
</div>
<script>
    const { ref } = Vue
    const HelloVueApp = {
        setup() {
            //定义变量
            const count = ref(1)
            //普通方法         入参
            function increment(){
                count.value ++
            }
            //箭头函数             入参
            const subIncrement = (()=> {
                count.value --
            })

            return {
                count,
                increment,
                subIncrement
            }
        }
    }
    //用vue实例调用方法
    const vm = Vue.createApp(HelloVueApp).mount('#hello-vue')
    console.log(vm.count)
    vm.increment()
    vm.increment()
    vm.subIncrement()

</script>
</body>
</html>
4.3计算属性
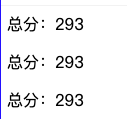
- 计算属性(computed):根据所依赖的数据动态显示新的计算结果。
- 示例:需要在 {{ }} 里添加计算再展示数据,例如统计分数
- 数值计算一般用法:
<html>
<head>
    <meta http-equiv="Content-Type" content="text/html;charset=UTF-8">
    <title>demo</title>
    <script src="https://unpkg.com/vue@3"></script>
    <style>
    </style>
</head>
<body>
<div id="hello-vue">
    <span>总分:{{ math + chinese + english }}</span>
    </p>
    <span>总分:{{ sum }}</span>
    </p>
    <span @click="sumFunc()">总分:{{ sum1 }}</span>
</div>
<script>
    const { ref,computed } = Vue
    const HelloVueApp = {
        setup() {
            //方式1
            const math = ref(90)
            const chinese = ref(101)
            const english = ref(102)

            //方式2,当使用了计算属性时,返回的属性名和变量名是相同的用法,在模版种用{{  }}就可以
            const sum = computed(()=>{
               return  math.value + chinese.value + english.value
            })

            //方式3,函数计算
            const sum1 = ref(0)
            function sumFunc(){
                sum1.value = math.value + chinese.value + english.value
            }
            return {
                math,chinese,english,sum,sum1,sumFunc
            }
        }
    }
    Vue.createApp(HelloVueApp).mount('#hello-vue')
</script>
</body>
</html>
- computed计算属性用法:
- 小结:计算属性一般就是用来通过其他的数据算出一个新数据,而且它有一个好处就是, 它把新的数据缓存下来了,当其他的依赖数据没有发生改变,它调用的是缓存的数据,这 就极大的提高了我们程序的性能。而如果写在function里,数据根本没有缓存的概念,所 以每次都会重新计算。这也是为什么不用function的原因!
4.4监听属性
- 监听属性(watch):是一个观察动作,监听data数据(setup中的变量)变化后触发对应函数,函数有newValue (变化之后结果)和oldValue (变化之前结果)两个参数。 当需要在数据变化时执行异步或开销较大的操作时, 这个方式是最有用的。
<html>
<head>
    <meta http-equiv="Content-Type" content="text/html;charset=UTF-8">
    <title>demo</title>
    <script src="https://unpkg.com/vue@3"></script>
    <style>
    </style>
</head>
<body>
<div id="hello-vue">
    <p @click="change()">消息:{{ msg }}</p>
    <p>观察消息:{{ watchMsg }}</p>
</div>
<script>
    const { ref,watch } = Vue
    const HelloVueApp = {
        setup() {
            const msg = ref('hello Vue!')
            const watchMsg = ref()

            function change(){
                msg.value = 'hello Go!'
            }
            //msg表示被监听的数据;newVal,oldVal是指被监听数据发生变化时,新值和旧值
            watch(msg,(newVal,oldVal)=>{
                console.log(newVal,oldVal)
                watchMsg.value = newVal
                //或者 watchMsg.value = msg.value
            })
            return {
                msg,watchMsg,change
            }
        }
    }
    Vue.createApp(HelloVueApp).mount('#hello-vue')
</script>
</body>
</html>
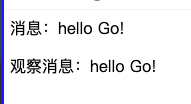
常见场景:表单选择时,下面的选项依赖上面的选项。就可以使用watch监听上面的选项(如实时调借口去getlist)下面的选项。
Last updated 25 Nov 2024, 23:56 +0800 .